What to Expect During a Basement Waterproofing Project
A basement waterproofing project is one of those jobs homeowners rarely think about until water makes the decision for them. Sometimes it starts with a faint musty smell after heavy rain. Sometimes it is a chalky white residue creeping along the bottom of a foundation wall. Sometimes it is much less subtle, like pooled water near a floor drain or a finished basement carpet that never quite dries out.
If you have never gone through the process before, the unknown can be as stressful as the moisture itself. People wonder how disruptive the work will be, whether the whole basement has to be torn apart, how long the project will take, and whether the fix will actually last. Those are fair questions. Basement Waterproofing is not cosmetic work. It is corrective work, and the right approach depends on why the water is getting in, where it is traveling, and what condition the foundation is already in.
Most homeowners are surprised to learn that a waterproofing job is rarely just about applying something to a wall. Water follows pressure, gravity, gaps, cold joints, porous concrete, footing lines, and the path of least resistance. A lasting repair starts with diagnosis, not product selection. That is why the early phase of the project matters so much.
It usually starts with a detailed inspection
A competent contractor should spend time looking at more than the wet spot you noticed. They will typically inspect the interior basement walls and floor, check corners and wall joints, look for cracks, inspect around windows, and pay attention to signs of prior repairs. They should also evaluate the outside conditions if access allows. That means grading, downspouts, gutter discharge points, hardscape slope, window wells, and any areas where water may be collecting against the home.
This is where experience shows. Two basements can have the same symptom and very different causes. I have seen one home with water appearing along a finished wall because a downspout was discharging only three feet from the foundation. I have seen another with nearly identical staining that traced back to hydrostatic pressure under the slab, which required an interior drainage system rather than a simple exterior correction. If someone offers a one size fits all answer after a five minute glance, that is a reason to slow down.
Expect the inspection to include questions about timing. Does the water appear only after hard rain, after snowmelt, or even during dry weather? Does it show up in spring and disappear in late summer? Has the basement ever flooded, or is the issue limited to dampness and odor? Those details help distinguish between surface water management problems, seasonal groundwater pressure, plumbing leaks, and foundation seepage.
You may hear terms that sound technical, but the ideas are straightforward
Waterproofing contractors often talk about hydrostatic pressure, capillary action, efflorescence, and lateral cracks. Those terms matter, but they are easier to understand than they sound.
Hydrostatic pressure is simply water building up in the soil around and beneath the foundation, then pressing against the basement walls or floor. Concrete is strong, but it is not immune to pressure or moisture migration. Capillary action refers to water moving through porous material, much like moisture rising through a sponge. Efflorescence is the white, powdery mineral deposit left behind after water passes through masonry or concrete and evaporates. It is a useful clue because it tells you moisture has been moving through the material, even if you never saw standing water.
Understanding these basics helps explain why painting over a damp wall rarely solves anything. A coating may improve appearance for a while, but if the water source remains, pressure and moisture movement continue behind it.
The proposed solution should match the actual problem
Not every basement waterproofing project looks the same. In some homes, the repair is mainly exterior. In others, interior drainage is the practical answer. In many cases, a complete solution involves both water management outside and collection or control inside.
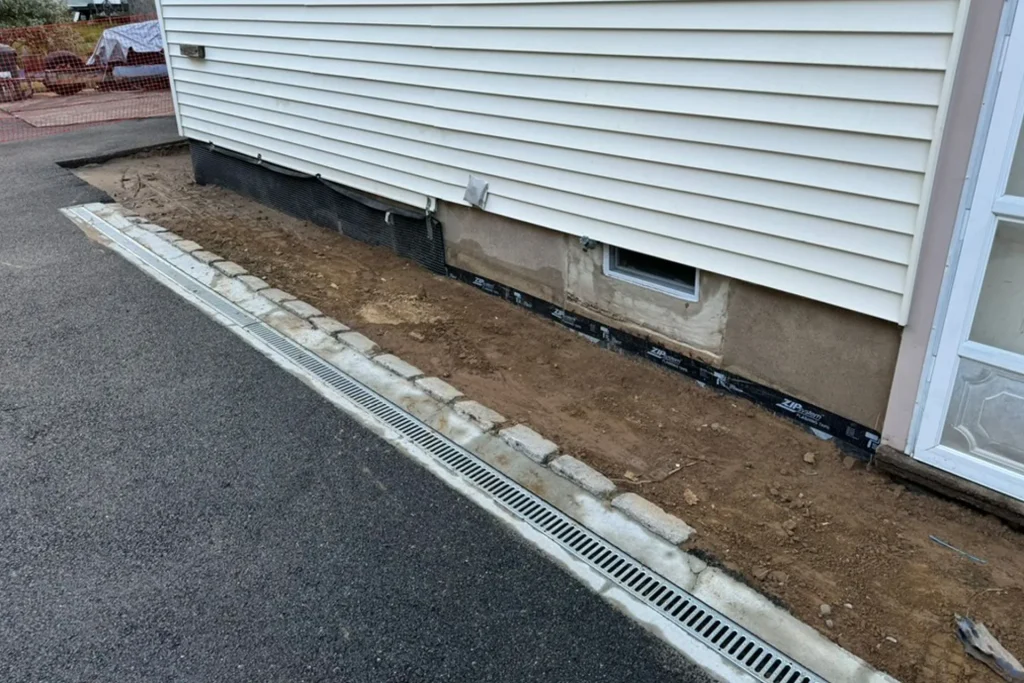
An exterior approach might involve excavation down to the footing, cleaning the outside foundation wall, repairing cracks, applying a waterproof membrane, installing drainage board, and improving footing drainage. This can be very effective, especially when the goal is to stop water before it reaches the wall. It is also more invasive and usually more expensive, since it requires digging around part or all of the house. Landscaping, decks, walkways, porches, and tight lot lines can complicate the work.
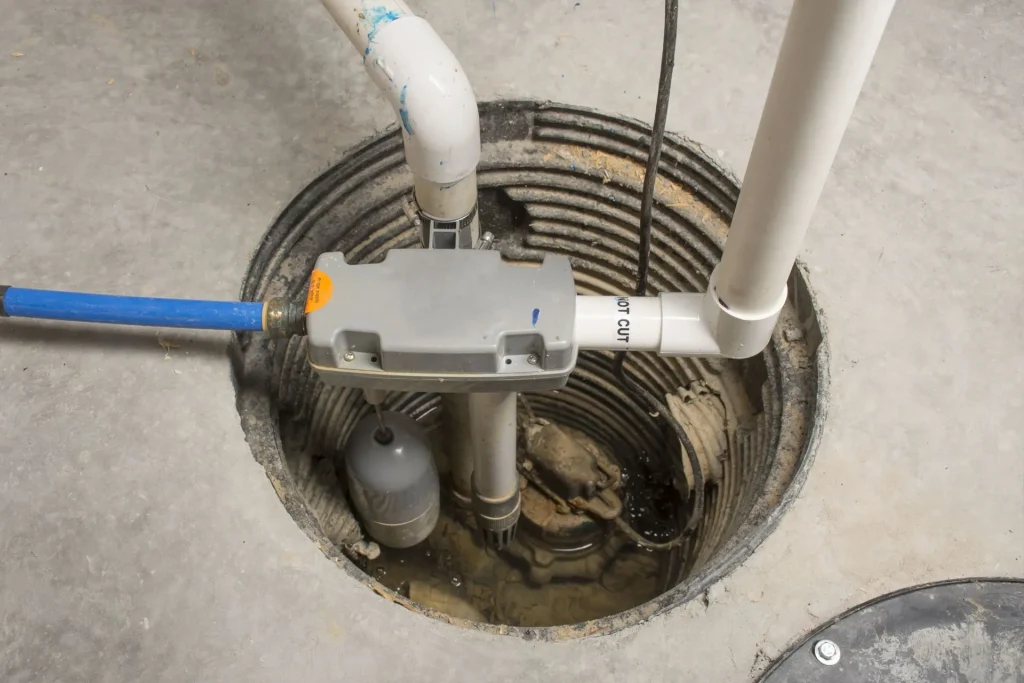
An interior system often involves cutting a trench along the perimeter of the basement floor, installing drainage channel or perforated pipe beside the footing, covering it with stone and fresh concrete, and directing collected water to a sump basin where a pump discharges it safely away from the home. This method does not stop water from reaching the outside of the foundation, but it relieves pressure and controls the water once it enters the perimeter zone. In many real world situations, especially with older homes or limited exterior access, this is the most practical and reliable path.
Crack injection is another common component. If the water entry is isolated to one or two foundation cracks, a contractor may recommend polyurethane or epoxy injection. Polyurethane is often used when active water intrusion is involved because it expands and helps seal against moisture. Epoxy can restore structural continuity in the right conditions. The appropriate material depends on the type of crack and whether movement is ongoing.
Expect some dust, noise, and disruption
Homeowners often underestimate the physical nature of this work. Basement waterproofing can be clean by construction standards, but it is still construction. If an interior drainage system is being installed, concrete cutting is usually part of the process. That means noise, dust control equipment, debris removal, and workers moving materials in and out of the basement.
A professional crew should isolate the work area as much as possible. Plastic barriers, floor protection, and negative air machines are common on careful jobs, particularly in finished basements. Even so, you should plan for disruption. Stored items usually need to be moved away from perimeter walls. In a tightly packed basement, that alone can take longer than people expect.
If the basement is finished, portions of drywall, trim, paneling, or built ins may need to be removed to expose the foundation wall or floor edge. Some contractors handle basic demolition and leave reconstruction to others. Some offer both. It is important to know that before the project starts, because the waterproofing scope and the restoration scope are not always the same contract.
Exterior work creates a different kind of disruption. Excavation equipment, dirt piles, temporary fencing, and access limitations around the house are common. Shrubs may need to come out. Patios or stoops may need partial removal. Good contractors talk about this up front instead of treating it like a surprise on day two.
How long the project usually takes
The timeline depends on the size of the basement, the repair method, and site conditions. A straightforward interior drainage system in an unfinished basement might take two to four days. A larger basement with a finished lower level, multiple cracks, a sump pump installation, and wall vapor management may run closer to a week. Exterior waterproofing can stretch longer, especially if weather delays excavation or if access is difficult.
One of the biggest variables is what the crew finds once work begins. Hidden wall damage, crumbling concrete at the footing edge, clogged old drain tile, or undocumented plumbing lines can all change the pace. That does not always mean a project is going badly. It often means the visible symptom was only part of the story.
The best project schedules leave room for that reality. A contractor who promises that every job is always done in exactly two days is either oversimplifying or talking only about a very narrow type of work.
What the first day often looks like
The beginning of the project is usually the busiest period for setup. Crews bring in tools, protection materials, pumps, pipe, gravel, and disposal containers. If there is interior work, they may mark cut lines on the slab and confirm the discharge route for the sump pump line. If exterior work is planned, equipment access and utility markings should already be addressed before digging begins.
This is a good time to ask practical questions. Where will debris go? Which entrance will the crew use? Will power or water need to be shut off at any point? How will pets and children be kept clear of the work area? Homeowners tend to focus on the technical repair, but the daily logistics matter too, especially if people are living in the house throughout the project.
A well run crew also confirms the original diagnosis once surfaces are opened up. I have seen projects where a crack that looked minor behind paneling turned out to be the main entry point, and others where the real issue was water tracking along the cove joint, the seam where the wall and floor meet. Once that is exposed, the repair strategy becomes more precise.
Interior drainage work is more methodical than dramatic
People sometimes picture jackhammers tearing apart the entire floor. In practice, the work is usually limited to a narrow perimeter trench, often around the basement walls rather than across the whole slab. The concrete is cut, removed, and a trench is opened beside the footing. Drainage material is installed, the area is backfilled with clean stone, and the slab is patched.
The sump basin is another key part of many systems. It collects water from the perimeter drain and gives it somewhere controlled to go. The pump then discharges that water away from the house through a dedicated line. Battery backup pumps are worth serious consideration in areas with heavy storms or unstable power service. The most important time for a pump to work is often the same time the electrical grid is under stress.
Some systems also include a wall moisture barrier or drainage membrane that directs seepage down into the perimeter drain. This is especially common when masonry walls allow moisture to migrate through more broadly rather than at isolated points. Homeowners sometimes worry that this means the wall is still wet behind the membrane. In a sense, yes, moisture may still be reaching the interior face of the wall, but the system is designed to control and redirect it so it does not damage the living space.
Exterior waterproofing is effective, but it asks more from the site
When exterior excavation is the chosen route, the work is often more labor intensive and visually disruptive, but it can be the right answer for severe wall leakage, failed exterior membranes, or sites where water pressure against the wall is overwhelming.
After excavation, the wall is cleaned so cracks, honeycombing, and weak spots can be repaired properly. A true waterproof membrane, not just a damp proof coating, is then applied in systems designed for below grade use. Drainage board may be added to protect the membrane and create a path for water to move downward to footing drains. If existing footing drains are broken or nonexistent, the contractor may install or replace them.
What homeowners should know is that exterior work is often at the mercy of conditions underground. Buried debris, roots, old repairs, and tight clearances around utility services can all make the project more complicated. Weather matters too. Heavy rain can turn a planned excavation sequence into a pumping and stabilization exercise. That does not mean the method is flawed. It means soil and water do not always respect neat schedules.
There may be recommendations beyond the waterproofing itself
A thorough contractor will often point out supporting improvements that are not the core waterproofing repair but still matter. If your gutters overflow every storm, or your downspouts dump water next to the house, even the best basement system is being asked to work harder than it should.
The most common related recommendations include the following:
- Extend downspouts well away from the foundation, often at least 6 to 10 feet where grading allows.
- Correct negative grading so soil slopes away from the house rather than toward it.
- Replace or cover problematic window wells if they collect runoff.
- Seal obvious exterior openings around penetrations or deteriorated mortar joints.
- Add a battery backup for the sump pump if outages are common in your area.
These are not glamorous fixes, but they can make a meaningful difference. I have seen homeowners spend thousands on interior drainage while leaving a downspout elbow disconnected at the corner of the house. That is like repairing a roof leak and then leaving the shingles piled in the driveway.
Pricing varies for good reasons
Waterproofing estimates can differ sharply, which confuses many homeowners. Part of that difference comes from scope. One estimate may include crack repair, drainage channel, sump pump, vapor barrier, and discharge line work. Another may cover only a minimal perimeter drain. Exterior excavation, disposal, and restoration can shift costs even more.
Part of the difference is also philosophy. Some contractors specialize in managing water once it reaches the basement. Others focus on keeping it away from the foundation wall from the outside. Neither approach is universally correct. The right answer depends on the structure, access, soil, budget, and how the basement is used.
Be careful with bids that are dramatically lower than the rest if the scope is not truly comparable. The cheapest option is often cheap because it leaves out an essential piece, such as proper discharge, pump capacity, or restoration of the trench area. Basement Waterproofing should be judged on performance, durability, and clarity of method, not just on line item totals.
How to prepare your home before the crew arrives
A little preparation makes the project smoother and can save time on the first day. In most homes, these steps help more than people realize:
- Clear stored items several feet away from basement walls.
- Remove valuables, paper goods, and electronics from the work area.
- Confirm where the crew can park and which entrance they will use.
- Ask how dust containment will be handled if the basement is finished.
- Make a plan for pets, children, and any rooms that need to stay accessible.
If the basement has finished walls, ask whether pictures, shelving, or mounted televisions need to come down in the affected area. If laundry equipment or freezers sit near the perimeter, confirm whether they need temporary relocation. It is much easier to sort those details out before a crew is carrying concrete out in buckets.
What happens after the installation matters too
Once the https://rentry.co/b2x853kx system is in, the project is not quite over. Fresh concrete patches need time to cure. The basement may need a few days of cleanup and settling before reconstruction starts. If walls were opened, drywall and trim repair may follow on a separate schedule. If exterior work disturbed landscaping, that restoration may happen immediately or be delayed by season.
A good contractor should walk you through the completed system before leaving. You should know where the sump basin is, how the pump operates, where the discharge line exits, and what routine checks are worth doing. If a backup pump was installed, you should know how to test it. If a dehumidifier is recommended, ask where it should drain and what humidity range you should aim for. In many basements, keeping relative humidity under about 50 to 55 percent helps prevent that persistent damp feeling and discourages mold growth on organic materials.
This is also the point where warranties come up. Read them carefully. Some cover water seepage through treated areas. Some are transferable. Some have exclusions tied to pump maintenance or structural movement. A warranty is useful, but it is not a substitute for understanding what was actually installed.
Signs the project was handled well
A successful waterproofing job is not judged only by whether the basement stays dry during the next storm, though that is obviously important. It also shows in the details. The crew explains what they found. The discharge route makes sense. The work area is protected and cleaned reasonably well. The patched slab is neat. The pump installation is accessible for service. The contractor does not become vague once the final payment clears.
One subtle sign of quality is restraint. Experienced waterproofing professionals do not oversell a miracle. They explain trade offs. For example, an interior drainage system can be highly reliable for controlling water and protecting a finished basement, but it does not make the exterior soil dry. An exterior membrane can be excellent at stopping wall infiltration, but if under slab water pressure is the real issue, it may not be enough on its own. Good advice sounds balanced because it is.
Why homeowners feel relieved once the right work is underway
Water problems carry a special kind of stress because they suggest hidden damage. People imagine mold behind walls, weakening foundations, ruined flooring, and a basement that can never be fully trusted again. Sometimes that fear is warranted. Often, though, the situation is more manageable than it feels at first.
The turning point usually comes when the source of the water is identified and the repair plan becomes concrete. Once a homeowner can see the trench, the drain path, the sealed crack, the sump setup, or the exterior membrane going on, the problem stops feeling mysterious. That matters. A basement does not need guesswork. It needs control.
If you are heading into a basement waterproofing project, expect some disruption, a fair amount of dust or excavation, and plenty of technical talk. But also expect that a well planned job follows a clear logic. Water is getting in for a reason. The project is about finding that reason, choosing the right method, and giving the house a dependable way to handle what the soil and weather throw at it. When that work is done well, the basement feels different afterward, not just drier, but settled, usable, and trustworthy again.
ARD Waterproofing
98 Smull Ave, West Caldwell, NJ 07006, United States
+1 917-691-8411
FAQ About Basement Waterproofing
Can you 100% Waterproof a Basement in West Caldwell?
A properly designed system can substantially reduce basement water intrusion, but no method can promise protection against every flood, equipment failure, or future change in site conditions. The first step is identifying whether moisture comes from surface runoff, groundwater, plumbing, or condensation. Solutions may include grading and gutter improvements, drainage, foundation repairs, and a sump system. Review the specific coverage and exclusions of any written warranty.
How much does it cost to professionally waterproof a basement in NJ?
There is no single price that fits every basement. Cost depends on the cause of the leak, the area needing work, access, excavation requirements, drainage design, sump equipment, and restoration of disturbed finishes or landscaping. Request an on-site assessment and an itemized written estimate that explains the scope, exclusions, and maintenance requirements before comparing proposals.
How long does foundation waterproofing last in West Caldwell, NJ?
Service life varies with the waterproofing materials, installation quality, soil and water conditions, and maintenance. Drainage components and pumps may require servicing or replacement even when other parts of the system remain functional. Keep gutters, drainage outlets, and sump equipment maintained, and have recurring leaks or changes in foundation condition assessed. Ask for product-specific expectations and written warranty terms rather than relying on one lifespan for the entire system.